Easily Create A Sas To Download A File From Azure Storage Using Azure Storage Explorer
- 12 Oct 2017
In this scenario, you want to provide your customer with a secured URL to download a file from Azure Storage. You can do this programmatically of course but another option is to use the Azure Storage Explorer to create a Shared Access Signature (SAS) for your customer. Then provide the URL necessary with the SAS so that they can download the resource securely over HTTPS.
It is important to note, that the SAS is the key into this file (or container) and like any key… You need to carefully consider how you use and/or distribute this information!
It is assumed you have an Azure Account and a basic knowledge of how to use your Azure Portal to access resources. You can do this walkthrough on Windows or Linux
Walkthrough
Install Azure Storage Explorer – This page has the download link for Windows and Linux: https://azure.microsoft.com/en-us/features/storage-explorer/
Open Azure Storage Explorer, and sign in using your Azure Account credentials.
Choose an existing Storage Account or create a new one and select this account (in my example I am using the existing ‘jeffs’ Storage Account).
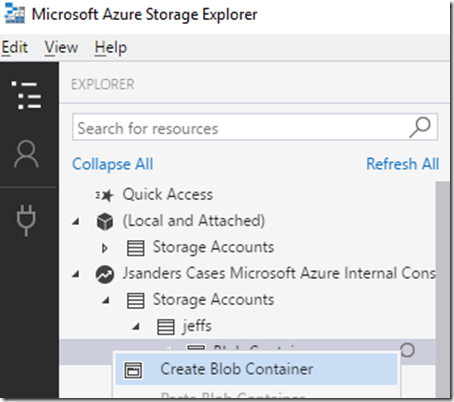
Select the Storage Account you are using and click on the ‘Blob Containers’ node, Either choose an existing Blob Container or, create a new one by right clicking on the ‘Blob Containers’ node and choose ‘Create New’:
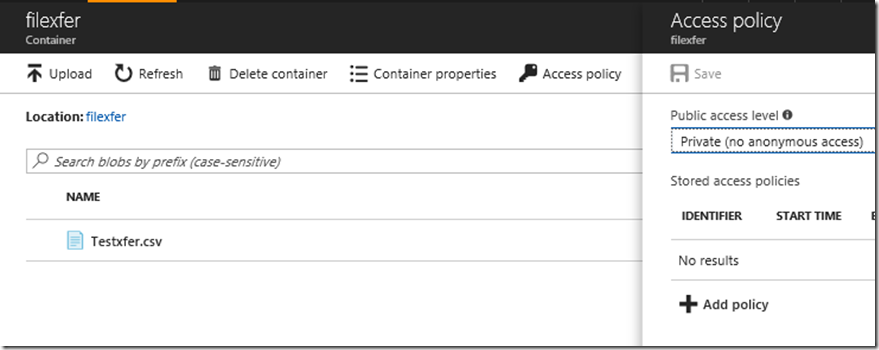
In the example below I selected an existing Storage Account called ‘jeffs’ and created a container called ‘filexfer’.
Ensure that the Container ‘Access policy’ is set to Private:
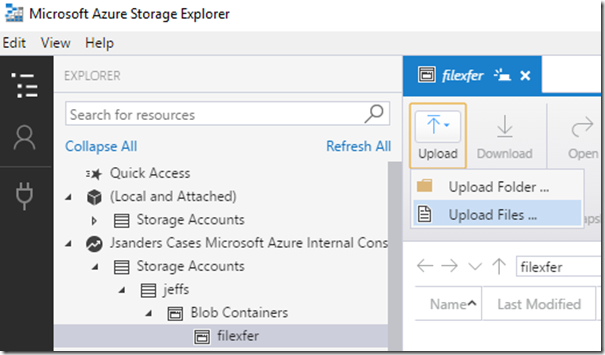
Now upload a file to the Blob Container. Simply click on the Blob container and choose ‘Upload Files…’:
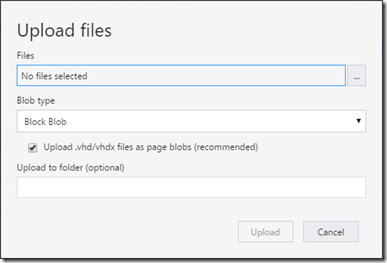
Select the file from the ‘…’ button and keep the rest of the defaults and hit the upload button:
Generate Shared Access Signature for the file
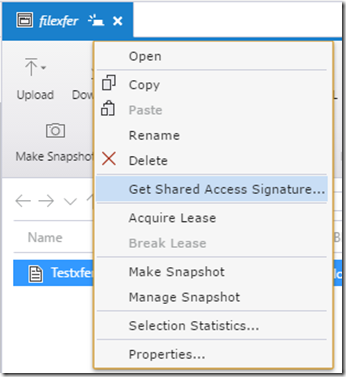
You now can generate a SAS. Right click on the file and select ‘Get Shared Access Signature…’ :
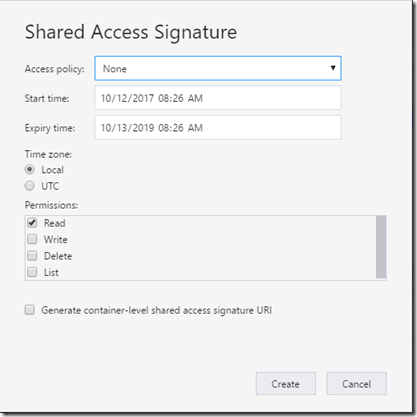
Set the Expiry time for the SAS for whatever you determine best suits your needs and set the permissions. In this case, I am setting it for two years and only giving Read permissions and hit the Create button:
(NOTE: If you app is writing multiple files to the container and you want to generate a SAS for then entire container (instead of one specific to this particular file) you can check the ‘Generate container-level… ‘ option here)
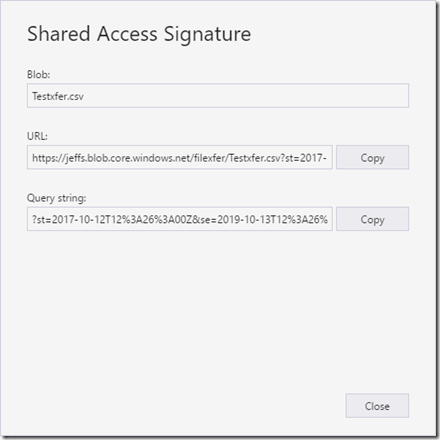
In the next screen simply copy and save the URL that was generated:
Now you can provide the URL to your customer and they can use this to securely download the file you have provided in Azure Storage!
Learn More
Let me know if this was useful to you! This only scratches the surface and I provided this since there was not a simple walkthrough to get you started. Make sure you understand the security implications of a long lifetime SAS like I showed here! Here is some more information for you to research:
Blob Storage: https://docs.microsoft.com/en-us/azure/storage/blobs/storage-blobs-introduction
You can create storage, SAS tokens and upload files programmatically as well:
Upload the file to storage using the key. https://docs.microsoft.com/en-us/azure/storage/blobs/storage-dotnet-how-to-use-blobs – relevant section for you is the ‘Upload a blob into a container’
Using shared access signatures (SAS) &
Retrieve the file from storage in an app (You do NOT want to give the customer your storage key)
https://docs.microsoft.com/en-us/azure/storage/common/storage-dotnet-shared-access-signature-part-1
Getting Started with Shared Access Signatures (SAS)
https://azure.microsoft.com/en-us/resources/samples/storage-dotnet-sas-getting-started/
Get started with Storage Explorer (Preview)
https://docs.microsoft.com/en-us/azure/vs-azure-tools-storage-manage-with-storage-explorer
<< Go Back